
Table of Contents
I actually had more important projects
Ordinary M6 hex-head screws were sitting in the slots of the Emcomat’s vertical slide and top slide, however.
They somehow fulfilled the role of T-nuts.
Somehow.
The bearing area of a screw head or hex nut is small, inserting them is decidedly awkward, and the solution was not particularly confidence-inspiring either.
So the more important projects were postponed once again.
In any case: I needed proper T-nuts.
Why make my own T-nuts?
Quite simply: I could not find suitable standard parts.
Once again, the slot geometry of the Emcomat does not seem common enough for me to simply order suitable profile stock or finished T-nuts.
The possible alternatives were:
- T-head bolts
- square nuts
- modified hex-head screws
- or homemade T-nuts
With square nuts, the thread engagement would have been too short for my liking.
The existing hex-head screws, on the other hand, offered only a small bearing area.
So making them myself was the remaining option.
I used cold-drawn C45 flat bar as the starting material.
Do not make every T-nut separately
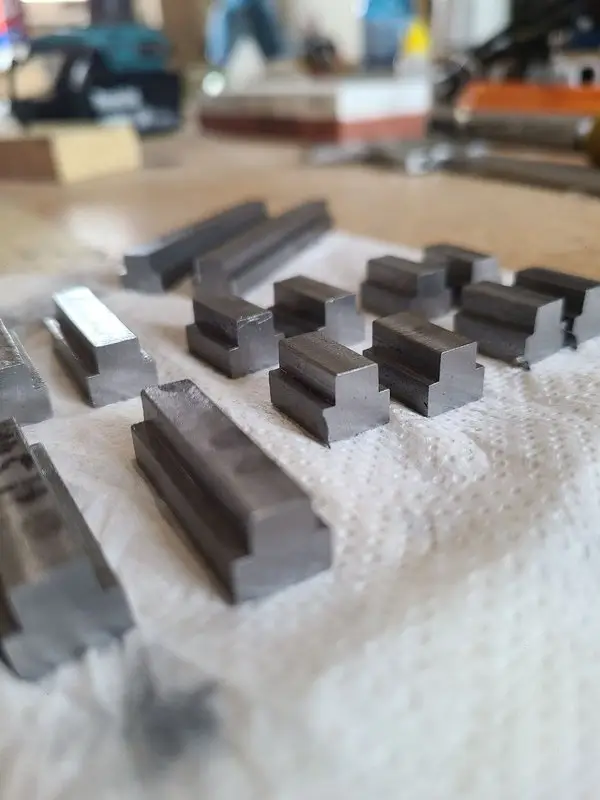
Instead of clamping and fully machining every T-nut individually, I first made longer profiled blanks.
This had several advantages:
- fewer individual setups
- the same geometry across several T-nuts
- better repeatability
- and less setup work
One blank was approximately 60.5 mm long.
It could be divided into four T-nuts, each approximately 14.5 mm long.
The blanks were intended to fit closely in the slot while still sliding in without force.
Or, as I described it in the forum:
A close fit, but they slide right in.
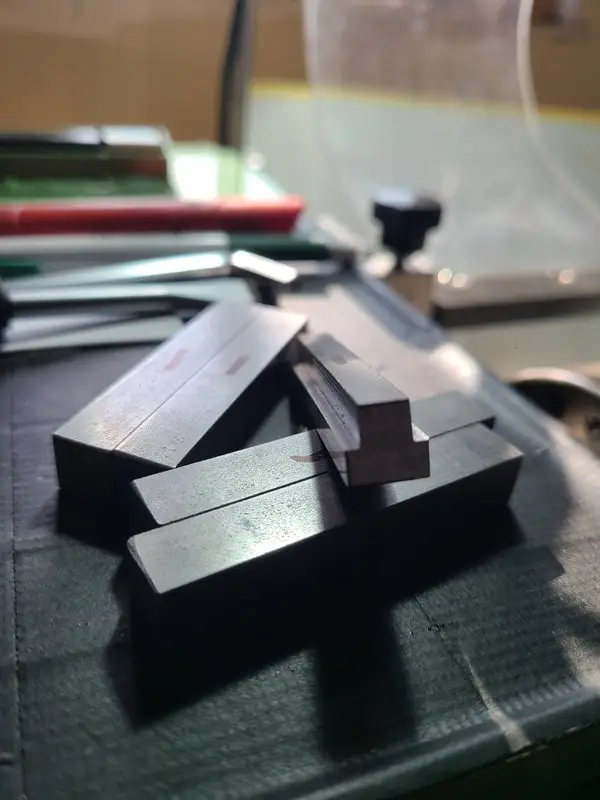
Caption: I first made longer profiled blanks. Only after machining were they divided into individual T-nuts.
The Emcomat lathe mills its own T-nuts
I still do not have a proper milling machine. Why?
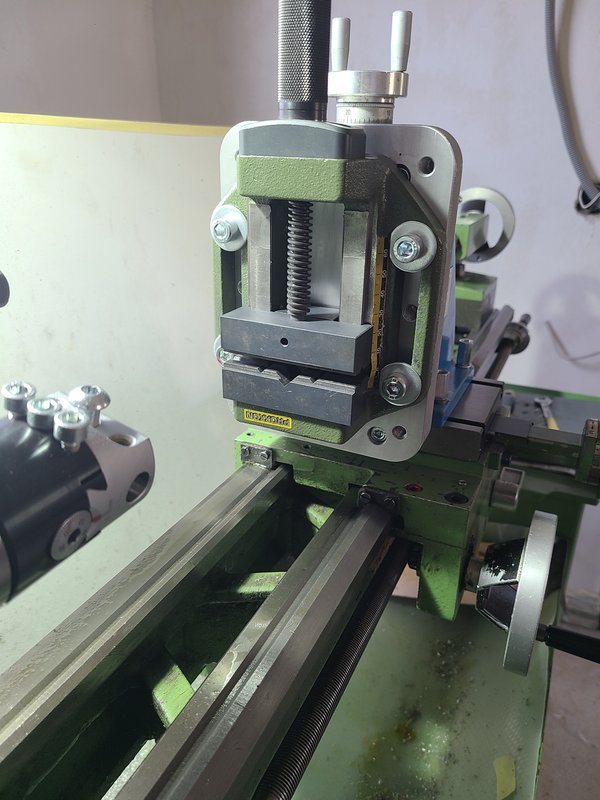
I therefore clamped the profiled blanks on the Emcomat’s vertical slide.
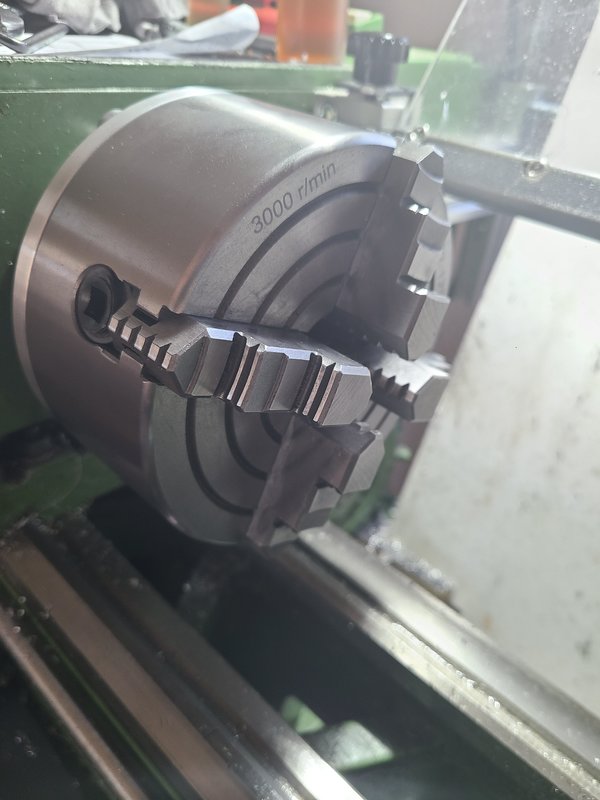
The cutter was held in the main spindle. In the three-jaw chuck.
This allowed me to machine the steps along the sides of the profile.
The setup was already aligned, which was exactly why I made several blanks at once.

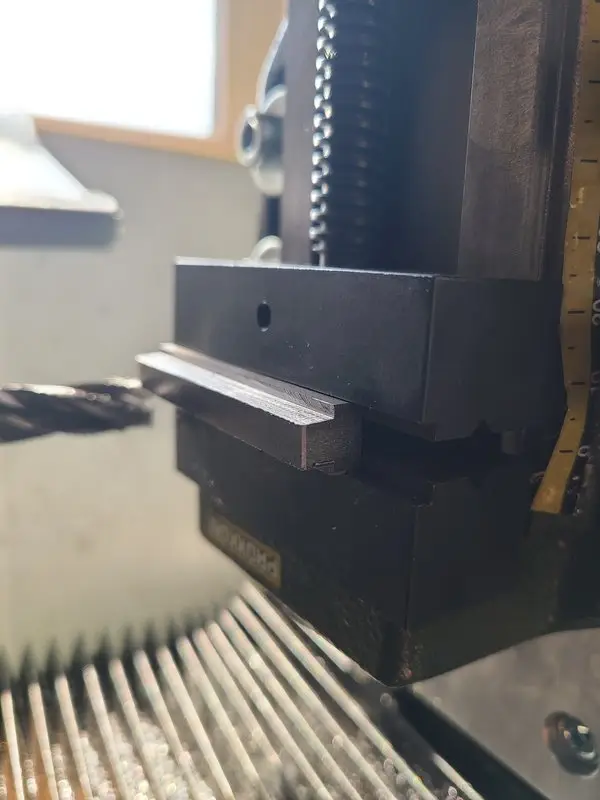
Anyone who has set up an unusual milling arrangement without a milling machine will know the thought:
As long as this is aligned, nothing gets unclamped.
I even offered to make additional blanks for people in the forum.
The overwhelming rush failed to materialize.
So I was able to continue without interruption.
A close fit, but not proud of the surface
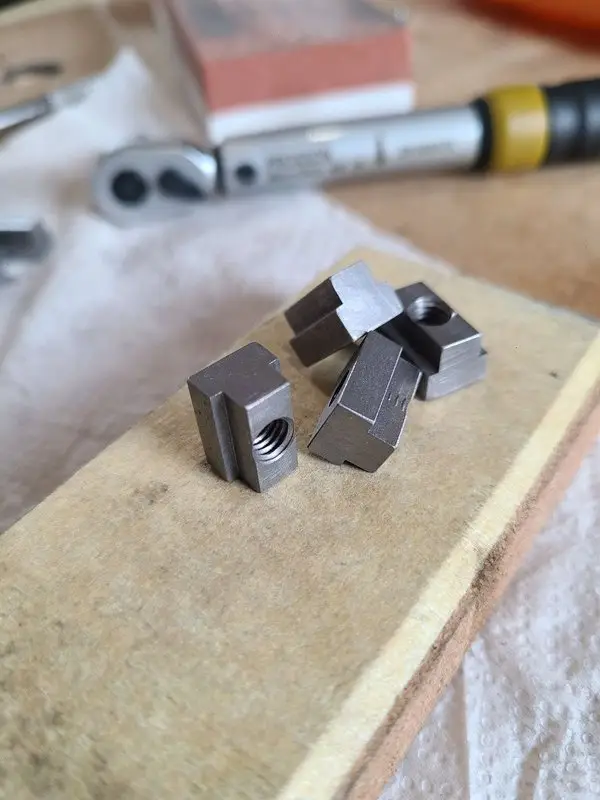
The finished T-nuts were not supposed to protrude above the slot.
I therefore machined the height of the blank in another setup.
The plan was to leave the top approximately 0.5 mm below the surrounding surface.
This ensured that the attached component would later sit on the intended machine surface rather than accidentally resting on the T-nuts.
A T-nut is supposed to take the clamping force.
It is not supposed to become a spacer. Or worse, a glider.

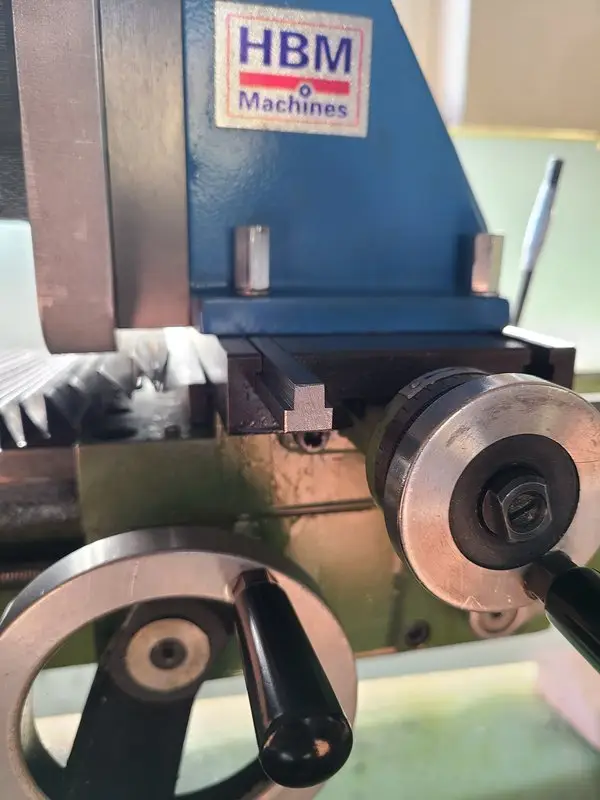

Caption: The T-nut fits closely in the slot but remains slightly below the mounting surface.
Cutting them to length with a homemade slitting-saw holder
After profiling, the long blanks had to be divided into individual T-nuts.
I first measured the setup.
I then locked the carriage. (I had not yet built the carriage stop at this point.)
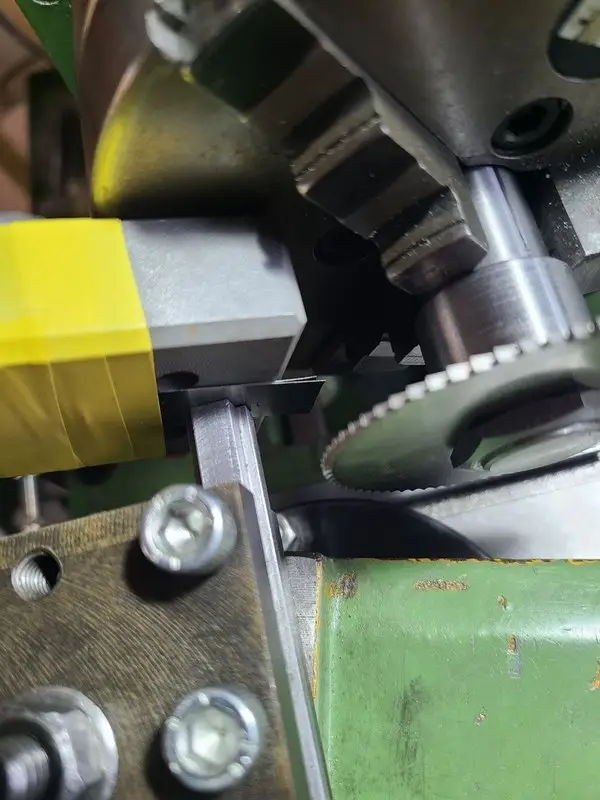
Using some offcut and shim stock, I made a simple stop to define the distance between the workpiece and the chuck.
The sequence was then always the same:
- Loosen the clamping screw of the T-nut holder.
- Slide the blank against the stop.
- Clamp the holder again.
- Cut off the T-nut.
- Repeat.
The stop was repeatable to roughly half a tenth of a millimeter.
In other words, about 0.05 mm.
That was more than accurate enough for the length of a T-nut.
Actually, considerably more accurate than necessary.
But once something works, I am not going to complain.
Sawing on the lathe
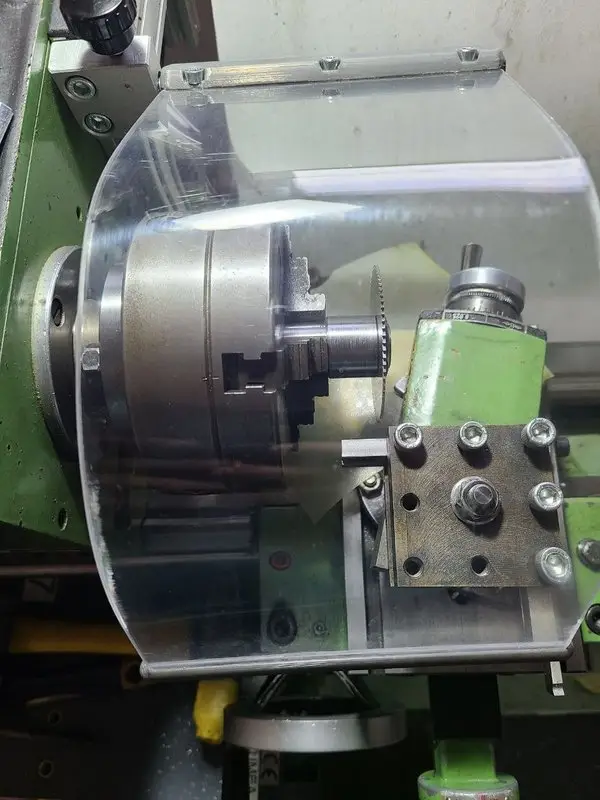
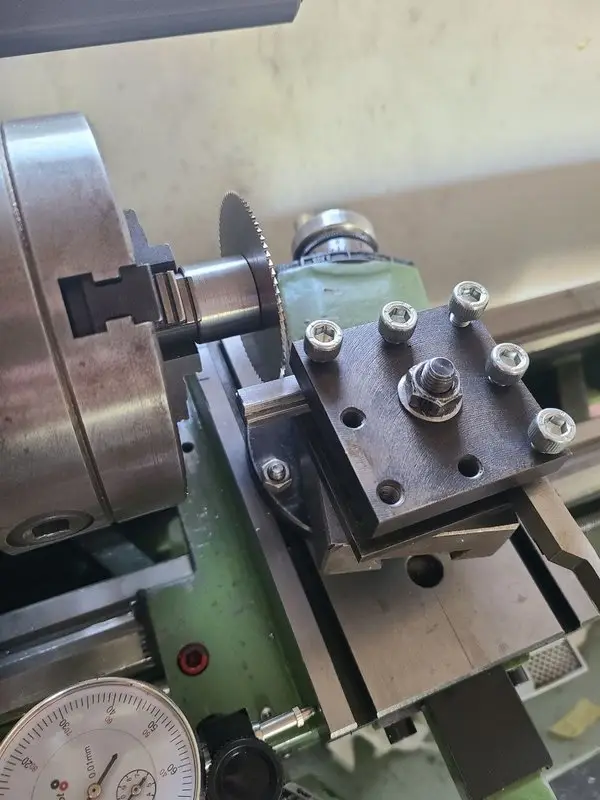
To cut the blanks to length, I used a homemade slitting-saw holder with a blade approximately one millimeter thick.
This separated the individual T-nuts at a length of about 14.5 mm.
This setup was not normal turning work either. The photographs look slightly as though someone confused a circular saw with a lathe.
But it worked.
Caption: A homemade slitting-saw holder with an approximately one-millimeter-thick blade was used to cut the blanks to length.
A stop made from an offcut and shim stock
The improvised length stop was simpler than a complete measuring or stop system.
It essentially consisted of:
- an offcut
- shim stock
- and the locked carriage
The shim stock allowed me to fine-tune the distance.
This let me slide each blank back to the same position.
That was sufficient for a one-off small batch.

The setup did not need to be universal.
It only needed to work once—and long enough to finish the T-nuts.
Drilling on the drill stand
After cutting them to length, the T-nuts received their M6 threads.
Each part had to be centered in both directions on the drill stand.
The hole was intended to be as close to the center as possible.
That did not work on the first attempt for every T-nut.
Two black sheep
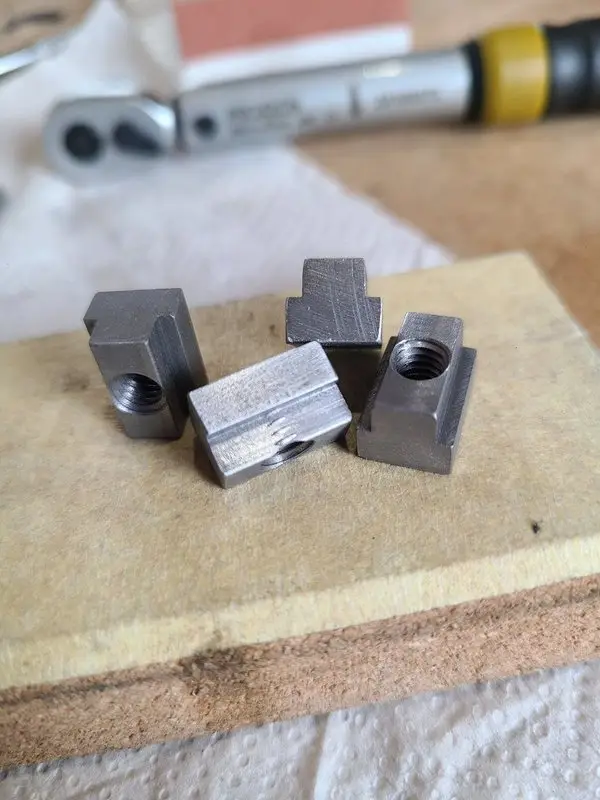
On the first two parts, the hole was approximately 0.2 mm off-center.
As a result, the thread crests became visible along one side.
That was annoying.
Not least because I only noticed the mistake after the second part.
The cause was not some mysterious machine inaccuracy.
The error was yet again standing in front of the machine: I simply had not paid enough attention while aligning the part.
I did not want to release the vise afterward, because that would have lost the entire position.
So I used shim stock again to correct the position of the workpiece in the vise.
After that, the center was correct.
The remaining T-nuts turned out considerably better.
Caption: On the first two T-nuts, the hole was approximately 0.2 mm off-center. This made the thread crests visible along one side.
Why M6?
I used M6 for the existing slots.
M8 would not have fitted sensibly—or at all—within the available geometry. Most of the accessories were already designed for M6 anyway. M6 is easily sufficient here.
Compared with the hex-head screws used before, the new T-nuts provided a much larger bearing area.
This distributes the clamping force more effectively in the slot.
There is also enough material for proper thread engagement.
The purpose of the new T-nuts was not to make it possible to use the largest possible screws.
It was to connect the existing M6 screws to the machine properly.
Harden them or leave them soft?
After machining, the question arose whether the T-nuts should be hardened.
There were two different lines of thought.
The arguments in favor of hardening were:
- less wear
- more wear-resistant threads
- and a harder bearing surface
The arguments against it were:
- The T-nuts could become more brittle.
- In the event of an overload, the T-nut or the thread might no longer be the most forgiving part.
- Unhardened C45 might already be entirely sufficient for the forces that actually occur.
The forum discussion generally advised against turning this into a major heat-treatment project.
After all, the T-nuts did not need to become highly stressed precision components.
Heated, oiled, and protected
I did not leave them completely untreated in the end.
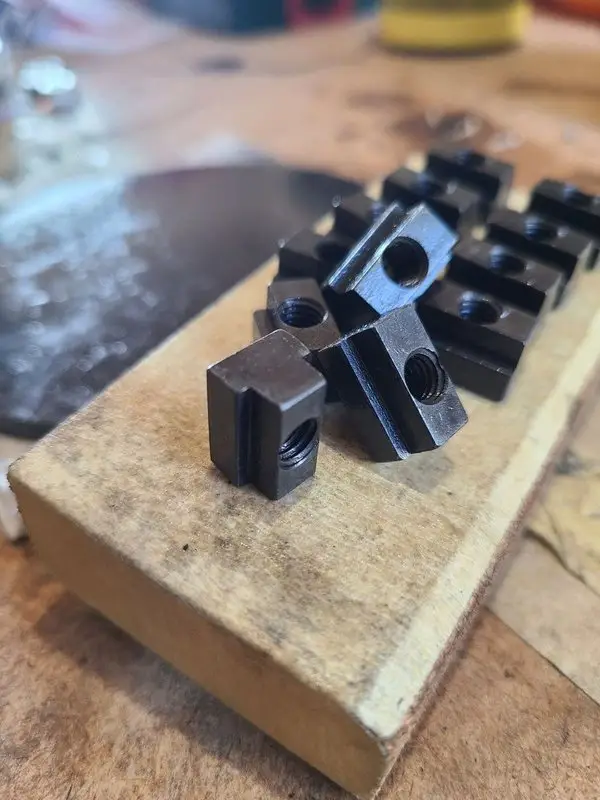
I heated the finished T-nuts with a gas torch and treated them with rapeseed oil or linseed oil.
At the time, I described this as minimal hardening, tempering, and protection.
I did not, however, measure any technically relevant hardness.
What is reliably documented is therefore:
- The surface was heated.
- The parts were treated with oil.
- This gave them a darker surface.
- They were better protected against corrosion afterward.
- And it simply looks better. Full stop.
Whether any meaningful hardening occurred remains open.
So far, that has not been important to their function either.
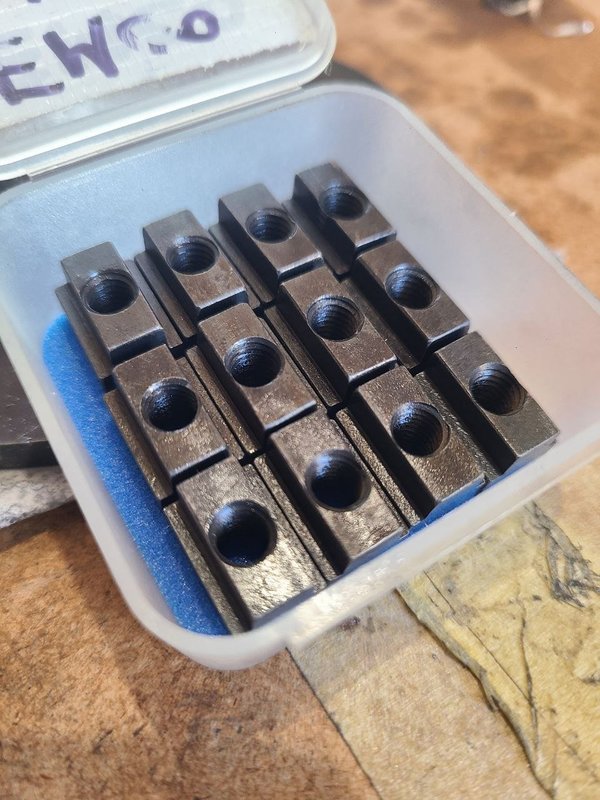
Caption: After treatment with a gas torch and oil, the T-nuts received a dark, protected surface.
A small stock instead of one-off production
In the end, I did not make only the set I needed at that moment.
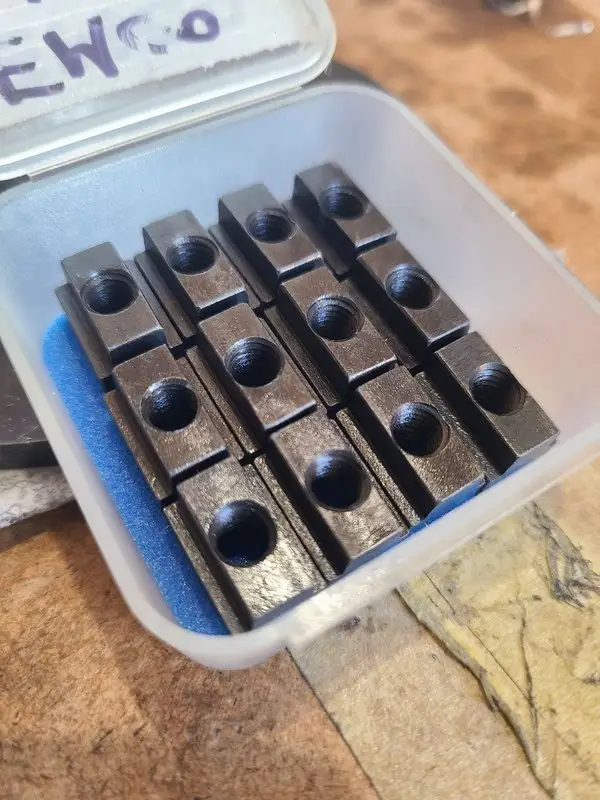
I made several T-nuts and still have a few blanks in reserve.
That makes sense for parts like these.
T-nuts are rarely needed according to plan.
Usually, exactly one is missing when a special setup needs to be assembled.
With a small stock, I can later mount:
- holders
- stops
- strap clamps
- the vertical slide
- the top slide
- or other fixtures
without another manufacturing session.
The parts therefore live together in a small labeled container.
A component that does not first need to be bought, searched for, or made is almost a luxury.
The benefit became clear later
When I later built the carriage stop, the T-nuts were already extremely useful.
There was not enough room there for normal strap clamps and step blocks.
The flat T-nuts allowed me to mount the required setup compactly and directly on the carriage.
The same principle also matters for the Solid Toolpost and other setups:
It is not only the large main component that determines whether a setup works.
Often, the small connecting parts underneath matter just as much.
No standard parts found
The forum discussion raised the reasonable question of whether suitable profile stock or finished standard parts were available.
I had not found anything suitable.
T-head bolts or square nuts would have been the closest alternatives.
With square nuts, however, the thread engagement would have been very short.
The slot may use an older Emco-specific factory dimension.
I could not confirm that with certainty.
For me, making the parts myself was therefore the cleanest solution.
Not perfect, but considerably better
Apart from the two examples with off-center holes, the T-nuts turned out well.
They fit closely in the slot while still sliding in.
They do not protrude above the surface.
There is enough material around the M6 threads.
And the bearing area is much larger than that of the screw heads used before.
For such a small part, making them without a milling machine involved a considerable amount of fiddling.
The result is still far better than the previous solution.
What I would do differently today
Prepare the drilling operation better
The first two off-center holes were avoidable.
Today, I would either:
- build an unambiguous stop
- use a simple drilling jig
- or check the position on a test piece before drilling and tapping the first thread
Make enough blanks from the start
I would do this part exactly the same way again.
Once a complicated setup has been aligned, it makes little sense to produce only the parts immediately required.
A few additional blanks then cost hardly any extra time.
Take a more sober view of the surface treatment
Today, I would no longer describe the result as true hardening unless the hardness had been tested.
The heat and oil treatment produced a dark, protected surface.
Anything beyond that would be speculation.
Use a milling machine (excellent advice, isn’t it?)
A milling machine would obviously be more convenient for profiled parts like these.
It would have allowed me to machine the blanks directly and repeatably.
Nevertheless, the same rule still applies:
Tools you have can be used. Missing tools sometimes have to be defeated with creativity.
Current status
The T-nuts are finished and are used for various setups on the Emcomat.
The documented details are:
- C45 as the starting material
- one longer profiled blank approximately 60.5 mm long
- approximately four T-nuts per blank
- approximately 14.5 mm length per T-nut
- M6 threads
- approximately 0.5 mm below the mounting surface
- a dark oil treatment after heating
- and two parts with slightly off-center threaded holes
The T-nuts do not need to win any beauty contests.
They need to fit the slot and hold.
They do.
Retrospective
T-nuts are not spectacular machine components.
They do not rotate.
They do not blink.
There is no motor, no controller, and no impressive mechanism.
Nevertheless, in many setups they determine whether an arrangement is safe and possible at all.
The starting point was a few M6 hex-head screws that somehow worked in the slots.
They led to:
- profiled blanks made from C45
- a milling setup on the lathe
- a repeatable length stop made from an offcut and shim stock
- a homemade slitting-saw holder
- several M6 threads
- two black sheep
- and a small stock of usable T-nuts
Not a large or particularly spectacular project.
But one that made many later projects easier.
Image gallery


Forum discussion (German)
The original build was documented in the forum.
It includes additional photographs of the setups as well as the discussion about standard parts, thread size, and possible hardening:
Forum discussion: Emcomat 8.6 — T-nuts made from C45
This article documents my specific manufacturing process and the setups I used. When milling, sawing, and drilling with unconventional machine arrangements, the workpiece, tool, direction of rotation, cutting forces, and possible collisions must be assessed independently.
How did you solve the T-nut problem?
I could not find suitable standard parts for my Emcomat lathe. I therefore made the T-nuts from C45 using the lathe, vertical milling slide, drill stand, shim stock, and a homemade slitting-saw holder.
Have you found suitable T-nuts for an Emcomat or another older machine, or did you make your own as well? I am particularly interested in different slot dimensions, usable standard parts, other manufacturing methods, and long-term experience with hardened or unhardened T-nuts.
A reliable explanation of which Emco factory standard these slots follow would also be very welcome in the comments.
Leave a Reply